
Privacy statement: Your privacy is very important to Us. Our company promises not to disclose your personal information to any external company with out your explicit permission.
Industrial robots serve human production
Since the 1950s, industrial robots have had their initial applications in human production: inspired by servo systems, engineers Joseph F. Englberger and George Devol jointly developed an industrial robot called Unimate, which was applied to General Motors' production workshops to complete repetitive picking and placing tasks. Since then, industrial robot technology has flourished, In the field of industrial production, replacing humans to complete many heavy and repetitive procedural tasks.
7th axis inspection requirements for industrial robots
With the continuous upgrading of industrial robot technology and the continuous enrichment of functions, having more axes can give robots more flexibility and increase their working range. However, modern industrial robots have added a seventh axis in addition to each rotation axis, often referred to as the "walking system" or "walking axis" of industrial robots.(Made in China 2025- High end CNC Machine Tools and Robots ", May 2018, Yang Zhengze, Shandong Science and Technology Press.)
The seventh axis of industrial robots is usually composed of a guide rail system, which adopts a ground or sky axis to load the robot or workbench and achieve the function of "walking". Due to the fact that the seventh axis is located at a relatively "fundamental" position in the entire system and plays a load-bearing role, its manufacturing and adjustment accuracy, as well as stability, to a certain extent affect the working accuracy and status of the entire robot working system.
Therefore, there are often extremely high standards for the manufacturing and adjustment accuracy of the seventh axis of industrial robots, and the testing requirements are also very strict - it is necessary to use micrometer level high-precision testing methods to comprehensively evaluate the straightness, parallelism, and height difference between the guide rails, in order to ensure the smoothness and stability of the entire system's operation.
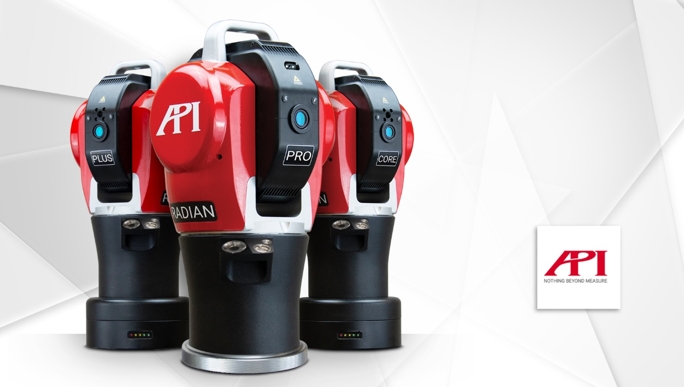
1:Radian(:Plus/Pro/Core)
Laser Tracker guide rail detection scheme
Laser trackers, as representative instruments for large-scale precision measurement, have been increasingly widely used in various manufacturing fields. It has the detection ability to implement 3D/6D precise measurement of the target at the micrometer level within a large scale range, and has been fully verified in the measurement and detection links in various manufacturing fields.
The laser tracker is fast and efficient in detecting the straightness and parallelism of guide rails. Simply install it in a suitable position around the tested guide rail, use a target ball to cooperate with it to collect guide rail data, and automatically analyze the required detection data in the Measurement Software and issue a report.
During measurement, the operator holds a laser tracker SMR target ball, and the tracker will shoot laser to the center of the target ball to lock and track the position of the target ball in real-time; The operator uses the target ball to touch the position to be measured and briefly stays, and the tracker will collect the spatial position coordinate data of the point at high speed and feedback it to the measurement software for analysis.
For specific operations, we will combine the following application examples of using API brand Radian laser tracker to detect and adjust the seventh axis guide rail of a certain type of industrial robot, and analyze them step by step.
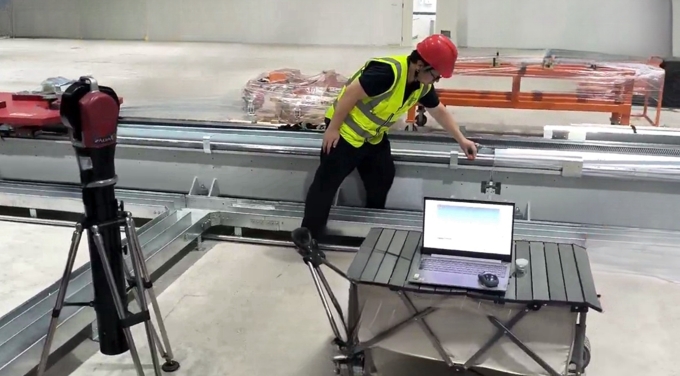
Figure 2: Radian Laser Tracker Robot Rail Inspection Site
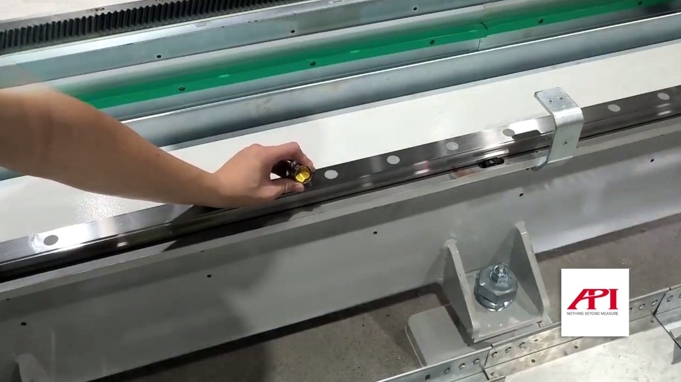
Figure 3: Using SMR target balls with laser trackers to collect data on the guide rail
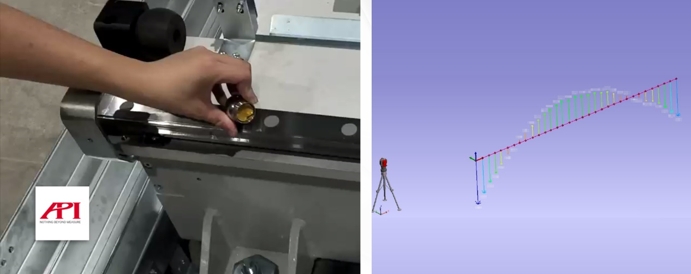
Figure 4: Field Collection of High and Low Direction Straightness Data (Left)&Software Analysis (Right)
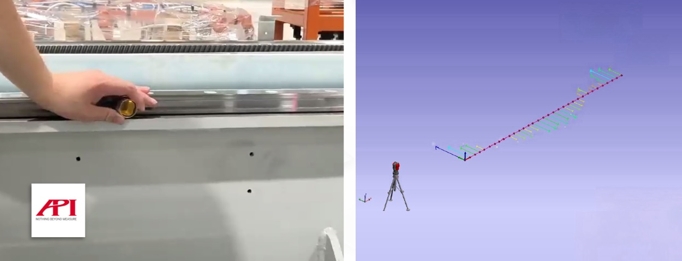
Figure 5: Field Collection of Horizontal Straightness Data (Left)&Software Analysis (Right)
Similar to the detection of straightness of guide rails, by collecting data from two guide rails according to the above steps, the software can automatically calculate and analyze the parallelism error between the two guide rails based on the data.
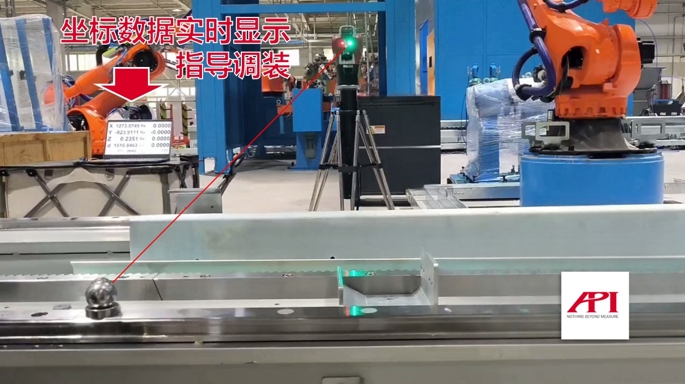
Figure 6: Installation Function Application Site
In addition to accurately measuring and evaluating the straightness and parallelism errors of the guide rail, the Radian laser tracker can also be used to achieve real-time adjustment of the guide rail on site.
The operator can stably place the target ball behind the guide rail and call out the "adjustment and installation" function. At this point, the Radian laser tracker can transmit the three-dimensional coordinates of the target ball position to the operator in real-time through the human-computer interaction interface, and adjust the direction and amplitude according to the set range data prompts. (Please refer to Figure 6 for schematic)
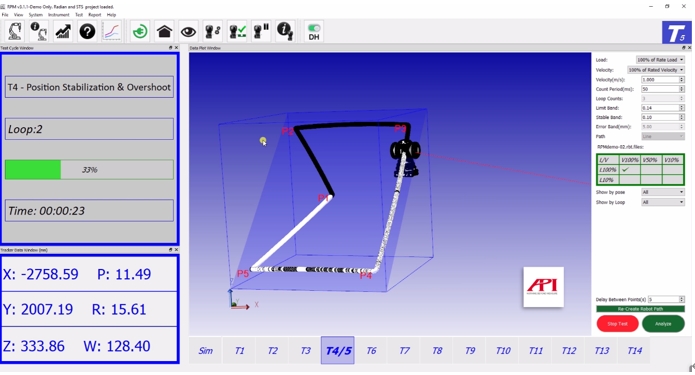
Figure 7: Measurement and analysis of robot performance indicators using a tracker in conjunction with API-RMS robot measurement software
More Radian laser tracker robot detection applications
In addition to the detection and evaluation of robot guides in this case study, Radian laser trackers can also be applied in more aspects of robot detection, including but not limited to: pose accuracy and repeatability detection, multi-directional pose accuracy variation, distance accuracy and repeatability, position stability time and overshoot, pose drift features, interchangeability, trajectory accuracy and repeatability, redirection trajectory accuracy, corner deviation Trajectory velocity characteristics, minimum positioning time, static compliance, swing deviation, etc. can also be combined with API-RMS robot measurement software to quickly and efficiently complete robot detection and calibration.
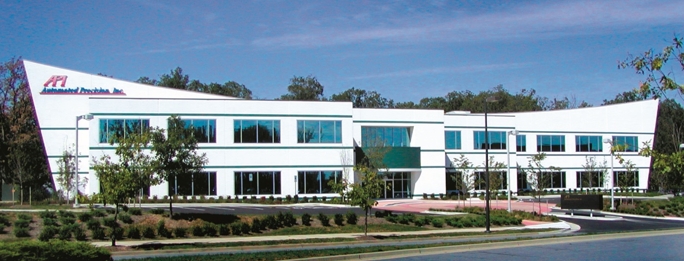
Figure 8: API Company Headquarters Building (Rockwell, Maryland, USA)

Privacy statement: Your privacy is very important to Us. Our company promises not to disclose your personal information to any external company with out your explicit permission.

Fill in more information so that we can get in touch with you faster
Privacy statement: Your privacy is very important to Us. Our company promises not to disclose your personal information to any external company with out your explicit permission.